

Images play a very important role in attracting visitors, providing breathing spaces inside of long articles and in making your content more popular. However, using images has a problem too – it decreases your page loading speed.
For every image you add to your post, the loading time is being increased. And it is estimated that only one second delay in page loading can decrease your conversion rate by 7 percent.
So, what should you do? Stop using images? That is not a smart decision. Instead, you should optimize your images so that they have the least impact on your site’s loading speed.
There are different techniques for optimizing images. In today’s post, I will introduce 5 killer tips to optimize images for your WordPress site.
1. Use Properly Sized Images
This is a common mistake made by most beginners and even some experienced bloggers. They often use images that are way larger in size. Suppose you only need a small preview of an image, which should be no more than 300 X 300 pixels. To do this, some people will use a large image and let the browser resize the image.
While there is no technical problem with this approach, you are using unnecessary bandwidth for both the visitor and your site. To avoid this, always resize the images close to the required size.
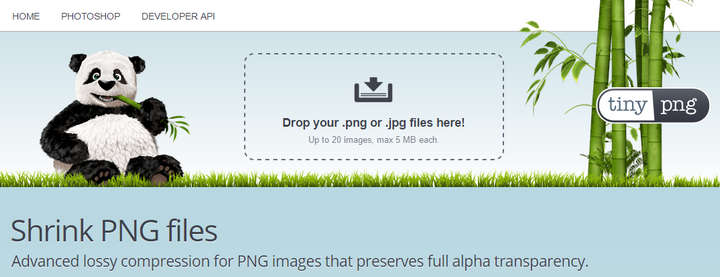
IrfanView could help in batch-resizing your images. And if you are looking for an online tool, tinyPNG could be an excellent choice. Despite the name, tinyPNG supports JPEG images too.

2. Choose the Proper Format
Most image editors let you save the images, screenshots or any other picture in a wide range of formats. However, the internet uses only a few formats including JPEG, PNG and GIF. So, what’s the difference between them?
If you are displaying photographs or images with lots of colors, then you should use JPEG. Besides containing many colors, this format also compresses the images to reduce the file size. On the other hand, PNG format uses lossless compression technologies to ensure a higher quality. Therefore, PNG format is more appropriate for screenshots, button, icons etc.
And if your image contains only a few colors, you can consider saving them in the GIF format. However, this format is most known for its use in animated files.
3. Use a Lazy Load Plugin
Lazy load is a relatively new concept in web design. This technique makes sure that images are loaded only when they are visible in the browser window. Therefore, the browser will not try to load all the images when the page is being loaded.
Using lazy loading technique saves bandwidth and improves the page loading time significantly. The improvement is more visible in pages containing multiple media files.
Nowadays, most premium WordPress themes come with this feature built-in. However, if your theme does not have this feature, you can use a third-party plugin to enable lazy loading in your website. Some popular plugins include Lazy Load, BJ Lazy Load, jQuery Image Lazy Load WP, etc.


We might publish a list of the best lazy loading plugins for WordPress in our blog soon.
4. Use a CDN Service
CDN stands for Content Delivery Network. CDN services have servers spread throughout the world. When you are using a CDN service, your visitors will receive the images from the closest server to their location. We covered 9 free WordPress CDN plugins in a post we recently wrote.
For example, if one of your visitors is from Philippines, and your CDN has servers in India and USA, then the visitor will receive the media files from India. Ultimately, the visitor will enjoy a faster page loading speed and a smooth browsing experience.
If your website has a considerable amount of traffic, then using a reliable CDN service is a must for you. If you are not prepared to use a premium service, you can try a free service first. Some popular free CDN services include CloudFlare, Incapsula, Photon by Jetpack, jsDelivr etc.


5. Use a Dedicated Image Optimization Plugin
Even after using all of the above tips, there is still room for further optimization. At this point, you can smush the images to further reduce the file size. Smushing an image removes irrelevant data like the camera type, GPS coordinates, creation date etc.
By removing the unnecessary data through smushing image, you can easily reduce the image size, reduce page loading speed and ultimately, provide an improved user experience to your visitors. While there are several free smushing plugins for WordPress, I recommend WP Smush.

Being developed and maintained by WPMU Dev, the plugin comes with all the necessary options for smushing your images. You can also upgrade to the premium version for getting advanced features.
Final Thoughts
As you can see, you can never underestimate the importance of optimizing images. However, optimizing images will have an impact on the image quality too. You should try to keep a balance between the image optimization and the image quality.
Let me know which image optimization technique(s) you like the most. And if you are using any other technique to optimize images in your WordPress site, don’t forget to share your experience with us.