A Complete, Easy Beginners Guide to WordPress Multisite
Multisite is an interesting feature of WordPress. Unless you are completely new to the world of WordPress, I am sure you have heard the term already. However, it is also true that a large portion of WordPress users don’t have any idea about what multisite is and how it can benefit them.
If that’s the case for you, then you have come to the right place. In today’s post, I will introduce you to WordPress multisite, how and why to use it, and I will also help you in identifying whether you need multisite or not. Let’s jump right into it!
What is WordPress Multisite?
WordPress multisite is a network of WordPress websites which allows you to manage all these websites from a single dashboard. The multisite network will allow you to create and manage new websites from one admin account. It is also possible to allow other people to create their own sites in the network.
In multisite networks, you can install new themes and plugins in all the websites at once. That includes another advantage, which is you won’t have to update the themes and plugins separately. You can update them in all websites from one place.
Do you need a Multisite Network?
Just because you know how to create and manage a multisite network does not mean you need one. Rather, multisite networks are useful for certain industries and professions. You can use multisite network if you run a magazine which has different sections. Multisite will also be useful for businesses that have offices in multiple countries and/or operate business in multiple sectors. It is also perfect for blog sites, schools, colleges or other educational institutions which want to allow the students or users to have their personal blogs or pages.
Okay, now that you know what a multisite network is and why you need it, let’s see how to create one.
How to Create a Multisite Network
Despite providing lots of useful features, setting up a multisite network is relatively easy. Before you start creating your network, there are three things you must do:
- If you haven’t changed the default permalink setup, do it now. WordPress multisite cannot work if you haven’t changed the default permalink. Go to Settings > Permalinks from your website dashboard to change the permalink structure.
- Disable all of your plugins. You can enable them again after creating the network.
- Create a complete backup of the database and files of your website. This will come handy if you mess up during the multisite creation process, or just in case.
Only after performing all of these tasks, you can proceed to creating your first multisite network in WordPress. To do that, add the following line in your wp-config.php file (which is located inside the main WordPress folder of your website):
define( 'WP_ALLOW_MULTISITE', true );
Add that line before the “/* That's all, stop editing! Happy blogging. */” comment.
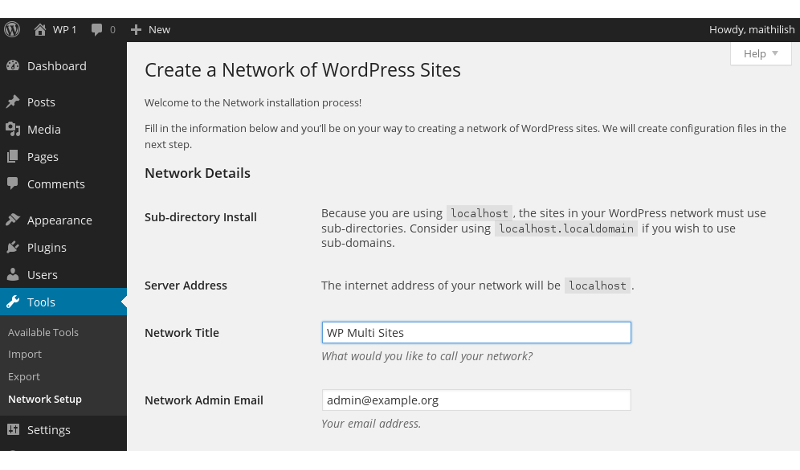
Save the file and reload your website dashboard. At this point, you should have a new sub-menu titled ‘Network Setup’ under the ‘Tools’ menu. If you go to that page, you will be provided with a screen like the following:
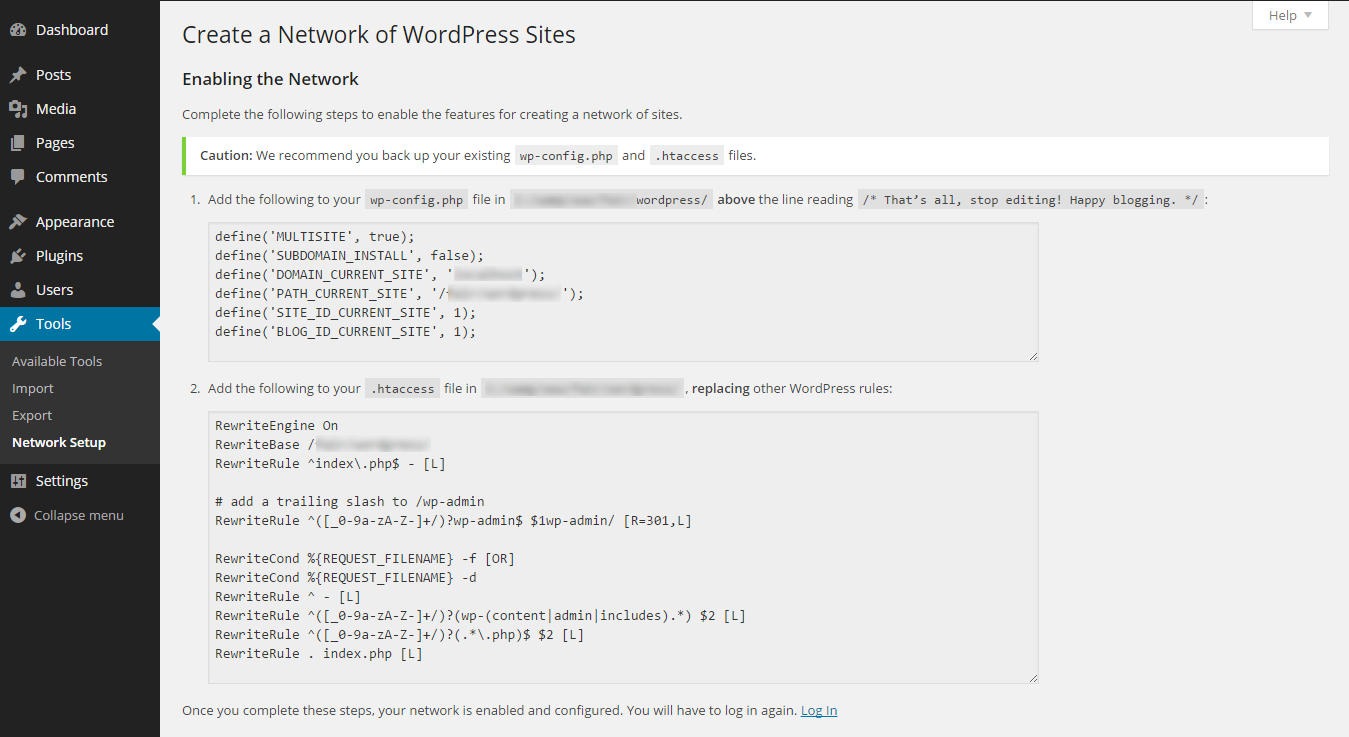
Now, you need to add some codes to the wp-config.php and the .htaccess files. You will find the necessary codes in the page. For the wp-config.php file, copy the code and place them after the “define( 'WP_ALLOW_MULTISITE', true );” line and before the “/* That’s all, stop editing! Happy blogging. */” line.
For the .htaccess file, open the file. Delete everything between the “# BEGIN WordPress” and “# BEGIN WordPress” and then, paste the code for this file between these two lines. Save the file and reload your WordPress dashboard. You have to log in again.
Once you log in to your dashboard, you will find a new menu titled ‘My Sites’ on top of your dashboard along with a key icon. Hovering over the menu will reveal a new drop-down menu which will show all the websites in your network and an admin menu.

Conclusion
So, that’s one of the most simple ways to create a multisite network in WordPress.
However, your task is not finished yet. You have to create new site(s) in your network and manage them from the admin dashboard. But that’s out of the scope of this article. Maybe I will prepare another tutorial on creating and managing new websites in multisite networks. Please let me know in the comments if you'd like to see it happen. ;)
And... if you have any question about the article above on WordPress Multisite setups, feel free to also let us know what you think by leaving a comment below. We will be glad to help you or answer your questions.
Other Resources for WordPress Multisite Setup:
- Guide to Installing multiple Blogs
- Ultimate Guide to WordPress Multisite