How to Create an E-Commerce Site With Wordpress

Creating an e-commerce site with WordPress begins with selecting a unique domain name and choosing a reliable hosting provider that supports WooCommerce. After securing these essentials, install WordPress and configure WooCommerce using its intuitive setup wizard. This setup includes setting up payment methods and shipping options. Opting for a responsive theme enhances the user experience, and adding products along with essential plugins ensures smooth functionality.
Beyond the initial setup, regular updates and robust security measures are crucial for maintaining your site's performance and safeguarding customer data. Interested in the next steps?
Domain Name Selection
Selecting a domain name is a pivotal step in defining your e-commerce site's online identity. Your domain name functions as your unique web address, such as "yourstorename.com," and is vital for branding and establishing an online presence. Aim for a name that is short, memorable, and closely aligned with your brand. The ".com" extension is preferred for its global reach and credibility.
Domain registration generally costs between $10 and $20 per year through providers like NameCheap. However, premium domain names can be significantly more expensive, sometimes reaching hundreds or thousands of dollars. Investing in a custom domain name can enhance your brand's professionalism and credibility.
If you're using WordPress.com, paid plans often include a custom domain name, while free accounts are limited to subdomains like "yourstorename.wordpress.com." This limitation can impact your branding and search engine optimization (SEO) efforts.
To ensure future scalability, avoid country-specific domain extensions like ".us" or ".uk," which could restrict your international reach. By carefully selecting and registering a domain name, you will establish a solid foundation for your e-commerce site's success.
Choosing a Hosting Provider
When choosing a hosting provider for your WordPress eCommerce site, prioritize security and performance. Look for specialized WooCommerce hosting plans that offer features like automated updates and enhanced security. Consider cost-effective options such as Bluehost and Hostinger, with plans starting at $2.75/month and $3.99/month, respectively.
Security and Performance Considerations
Selecting a dependable hosting provider is crucial for the success of your e-commerce site, as it directly impacts performance, security, and uptime. When evaluating hosting providers, prioritize those that offer robust security features and high performance. Bluehost, recommended by WordPress, is a strong contender, providing optimized plans starting at $2.75/month with a free domain included.
Avoid shared hosting due to potential security vulnerabilities, especially concerning sensitive customer data. Instead, opt for managed WordPress hosting solutions, which offer enhanced protection. Look for providers that include SSL certificates (HTTPS) to encrypt customer data during transactions. This is fundamental for building trust and meeting security standards.
Regular updates and backups are critical. A good hosting service will handle these, minimizing the risk of data loss or breaches. Speed is also significant; a one-second delay in page load time can reduce conversions by up to 7%, directly affecting your bottom line.
| Feature | Importance | Example |
|---|---|---|
| Security | Essential for protecting sensitive customer data | SSL certificates |
| Performance | Affects user experience and conversion rates | Fast load times |
| Managed Services | Regular updates and backups for added protection | Managed hosting |
Choosing the right hosting provider ensures your e-commerce site remains secure, fast, and reliable.
Cost and Plan Options
Choosing a hosting provider for your WordPress e-commerce site can be daunting, but understanding the cost and plan options can simplify the decision-making process. For eCommerce hosting, Bluehost is a highly recommended option. Their plans start at $2.75 per month and include a free domain with the Basic plan. For those focusing on online stores, Bluehost offers WooCommerce hosting plans starting at $12.95 per month, designed to ensure optimal performance and security.
If budget constraints are a significant concern, Hostinger provides a more affordable hosting plan at $3.99 per month with a 48-month subscription. However, it is important to note that Hostinger may not match Bluehost's performance ratings.
Domain registration costs typically range from $10 to $20 per year, though premium domains can be significantly more expensive. Selecting an appropriate domain name early can help mitigate higher costs later.
It is advisable to avoid shared hosting due to its security vulnerabilities. Instead, consider dedicated or managed WordPress hosting to safeguard sensitive customer data and ensure a secure environment for your e-commerce site.
Hosting Features Comparison
Understanding the cost and plan options is just the beginning; the next step is to compare the features offered by different hosting providers to find the best fit for your e-commerce site. When selecting a hosting provider for your WordPress site, especially if you're using WooCommerce, it's vital to focus on specialized plans that offer enhanced security features and optimized performance.
Shared hosting might seem economical, but it often lacks the robust security needed for handling sensitive customer data. Instead, prioritize dedicated or managed hosting solutions. For example, Bluehost offers WooCommerce-optimized plans starting at $12.95/month, which include automatic updates and advanced security measures.
Performance metrics such as uptime guarantees (aim for 99.9% or higher) and fast page loading speeds are crucial for maintaining a seamless user experience and increasing conversion rates. Additionally, many hosting providers like Bluehost offer free domain registration, making it a cost-effective choice.
Here's a quick comparison to guide your decision:
| Feature | Bluehost WooCommerce Plan | Shared Hosting Plan |
|---|---|---|
| Monthly Cost | $12.95 | $2.75 |
| Security Features | Enhanced | Basic |
| Uptime Guarantee | 99.9%+ | Variable |
Always opt for a hosting provider that offers 24/7 customer support, including live chat and phone support, to quickly resolve any issues and keep your e-commerce site running smoothly.
Installing WordPress

Now that you've chosen a hosting provider, let's move on to installing WordPress. Most hosting providers offer a one-click install option, which simplifies the process. Some hosts, like Bluehost, even offer WordPress pre-installed, allowing you to start building your site immediately. Alternatively, you can manually upload the WordPress files to your hosting account if you prefer a hands-on approach.
One-Click Install Option
Setting up your WordPress site can be incredibly simple with the one-click install option provided by many hosting services, such as Bluehost. This feature streamlines the entire setup process, eliminating the need for manual uploads and configurations. By choosing a hosting provider that offers one-click installation for WordPress, you can have your site up and running in just a few steps.
This option is particularly advantageous for beginners who might find traditional installation methods daunting. After selecting the one-click install option in your hosting dashboard, you will be guided through an easy setup process. This usually involves naming your website and establishing your admin credentials. It's an efficient way to get started without needing to delve into technical specifics.
Once the setup is complete, you will receive a confirmation email containing your login credentials. This enables you to access your new WordPress dashboard immediately and begin customizing your site. The one-click installation method not only saves you time but also reduces the risk of errors, making it an excellent choice for anyone looking to create a WordPress site effortlessly.
Manual Installation Steps
For those who prefer greater control over their WordPress setup, manual installation is an excellent option. Start by downloading the latest version of WordPress from the official website and unzipping the files on your computer. Then, use an FTP client to upload the unzipped WordPress files to your web hosting server, placing them in the desired directory or root folder.
Next, create a MySQL database and user through your hosting provider's control panel, ensuring the user has full permissions to the database. Locate the "wp-config-sample.php" file in your WordPress directory, rename it to "wp-config.php," and edit it to include your database name, username, and password.
Once these steps are completed, access your website URL in a web browser to run the WordPress installation script. Follow the on-screen prompts to finalize the setup. This manual installation process allows for greater customization, particularly beneficial for advanced eCommerce configurations. By manually installing WordPress, you ensure that every detail is tailored to meet your specific needs.
Configuring WooCommerce
Setting up WooCommerce can initially seem daunting, but the setup wizard simplifies the process significantly. This tool guides you through essential steps to get your e-commerce site operational swiftly. The WooCommerce setup wizard first assists in configuring your locale settings, such as country, language, and currency, ensuring your store is tailored to your target audience.
During the wizard, you'll also configure various payment methods. Options like PayPal, Stripe, cash on delivery, and bank transfers provide flexibility for customer transactions. WooCommerce automatically creates essential store pages, including Shop, Cart, Checkout, and My Account, enhancing the shopping experience for your customers.
Next, you'll set up shipping options to meet your needs. You can choose from fixed rates, free shipping, or live rates from carriers to ensure the best shipping experience for your customers. It's crucial to keep WooCommerce and its extensions updated regularly to maintain security, add new features, and comply with the latest eCommerce standards.
Key points to remember:
- Locale setup: country, language, and currency.
- Enable multiple payment methods.
- Automatic creation of essential store pages.
- Configure tailored shipping options.
- Regular updates for security and new features.
Adding Business Details
When adding your business details in the WooCommerce setup wizard, it is essential to provide accurate information, including your business name, address, and contact details. This ensures compliance with legal requirements and builds trust with your customers. You will also need to specify whether you are selling physical products, digital products, or both. This selection is crucial as it allows your online store to meet a wider range of customer needs.
Clearly define your digital products, such as e-books or software, which can be downloaded immediately after purchase. For physical products, ensure you provide tangible goods that require shipping and accurately calculate shipping rates and options.
Completing the business details section accurately is vital for your store's functionality, impacting payment processing, tax calculations, and shipping logistics. Below is a summary to help you stay on track:
| Step | Description |
|---|---|
| Business Name | Provide your official business name |
| Address | Enter your accurate business address |
| Contact Information | Include phone number and email |
| Product Types | Specify if you're selling physical, digital, or both |
Selecting Payment Options
Selecting the right payment options for your WooCommerce store is crucial for ensuring a smooth and secure transaction process. Start by integrating popular and trusted payment gateways like PayPal and Stripe, which support credit and debit card transactions directly on your site.
Enabling automated payment options for subscriptions can provide a seamless experience for recurring billing, which is essential if you're offering membership plans or subscription-based services.
Consider the following key points when selecting your WooCommerce payment options:
- Popular Payment Gateways: Integrate PayPal and Stripe to facilitate easy credit and debit card transactions.
- Secure Payment Processing: Utilize SSL certificates and reliable gateways to protect customer data and build trust.
- Multiple Payment Methods: Offer a variety of payment options to meet customer preferences.
- Automated Payments: Set up automated billing for subscriptions to streamline recurring payments.
- Flexible Modifications: Easily update and add new payment methods as your business grows.
Setting Shipping Options
When configuring shipping options in WooCommerce, you can choose between fixed pricing, free shipping, or live rates from carriers based on your primary shipping zone. Integrate carriers like UPS to offer real-time rates and tracking, thereby improving your customer experience. Additionally, set up shipping classes to group products with similar shipping requirements, simplifying the management of rates and options.
Shipping Rate Choices
Optimizing shipping rate options in WooCommerce is essential for providing flexibility and convenience to your customers. By setting your shipping options carefully, you can ensure a seamless experience tailored to your customers' locations and specific needs.
Key Steps to Optimize Shipping Rates:
- Define Shipping Zones: Set distinct rates for different geographical areas, ensuring accurate shipping costs and preventing over or under-charging for certain regions.
- Utilize Shipping Classes: Manage varying rates for different product types. For instance, apply different rates for bulky or fragile items to reflect their specific shipping requirements.
- Offer Multiple Shipping Options: Choose from fixed pricing, free shipping, or live rates from carriers like UPS and FedEx. This flexibility allows you to meet your customers' preferences.
- Provide Local Delivery or Pickup: Enhance convenience for customers who prefer to collect their orders in person by offering local delivery or pickup options.
- Integrate Shipping Plugins: Use plugins for automated label printing and tracking to streamline your shipping processes.
Carrier Integration Options
Integrating major shipping carriers into your WooCommerce store revolutionizes your shipping logistics. With WooCommerce, you can seamlessly connect with carriers like UPS, FedEx, and USPS, providing real-time shipping rates directly from your dashboard. This integration ensures customers receive accurate cost estimates during checkout.
By setting up specific shipping zones and rates based on the customer's location, you can ensure precise shipping cost calculations. This allows you to tailor shipping methods for different geographic areas, offering options such as flat rate shipping, free shipping, or local pickup to meet diverse customer needs.
WooCommerce's support for shipping classes enables you to apply different rates to specific product categories or types, which is essential for managing a varied inventory with distinct shipping requirements. Additionally, automated shipping calculations through extensions streamline the fulfillment process, enhancing transparency and customer satisfaction.
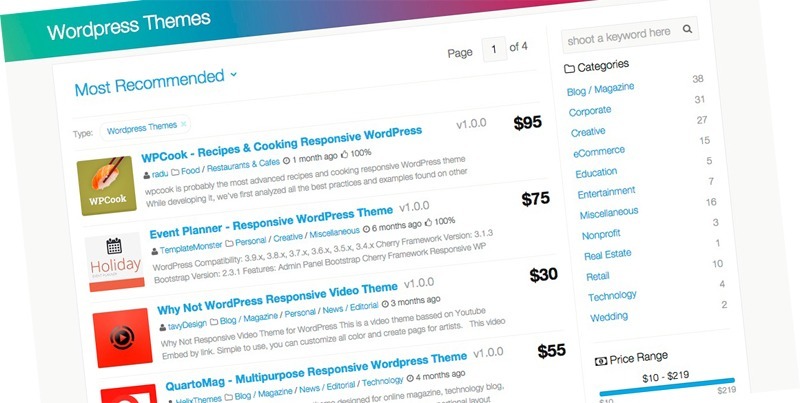
Choosing a Theme
Selecting the right theme for your e-commerce site is akin to choosing the foundation of a building—it determines the overall design and functionality. When choosing a theme, ensure it supports WooCommerce functionalities, as this is crucial for seamless online shopping experiences. The WordPress theme directory offers a variety of free and premium themes from third-party developers.
Popular options like Storefront, Astra, and OceanWP are optimized for speed, customization, and responsive design, ensuring a seamless shopping experience on both desktop and mobile devices. Opting for a theme that supports product displays and shopping cart integration is fundamental for a smooth user experience.
Consider these factors when selecting your theme:
- Customization Options: Many premium themes offer drag-and-drop builders, facilitating layout adjustments without the need for coding skills.
- Positive Reviews: Choose themes with high ratings and positive feedback to ensure reliability and functionality.
- Regular Updates: Select themes that are frequently updated to ensure security and access to new features.
- WooCommerce Compatibility: Verify that the theme is specifically designed to work with WooCommerce.
- Support: Reliable customer support can save you time and frustration.
Adding Products
Incorporating products into your e-commerce site is a crucial step in setting up your online store. Begin by navigating to your WordPress dashboard, then click on "Products" and select "Add New." This will take you to the product creation screen where you can fill in essential details like the product name, description, and type (simple, variable, grouped, etc.).
In the "Product Data" section, you can set pricing, manage inventory, and define shipping details. This ensures each product is accurately represented and easily manageable.
| Field | Description |
|---|---|
| Product Name | The title of your product |
| Description | A detailed overview of your product |
| Product Data | Pricing, inventory, and shipping details |
Don't forget to upload high-quality images in the "Product Image" and "Product Gallery" sections. Products with multiple images attract more customer interest and improve conversion rates.
| Image Section | Purpose |
|---|---|
| Product Image | Main image displayed prominently |
| Product Gallery | Additional images showing different angles or views |
Installing Additional Plugins
After adding your products, enhance your e-commerce site's functionality by installing additional plugins. Navigate to your WordPress dashboard and select "Plugins" > "Add New." You can search for specific eCommerce plugins or browse through popular options. Once you've found the desired plugin, click "Install Now," and after installation, click "Activate" to enable it on your site.
Consider these popular plugins to get started:
- Yoast SEO: Enhances search engine optimization, making your products easier to find.
- WooCommerce Subscriptions: Efficiently manages recurring payments.
- Mailchimp for WooCommerce: Automates your email marketing efforts.
- WP Super Cache: Improves site speed through efficient caching.
- Sucuri Security: Protects your site from potential security threats.
Before installing any eCommerce plugins, check their compatibility and reviews to avoid conflicts with your existing theme or other plugins. This ensures optimal performance and a smooth user experience. Regularly updating your plugins is also crucial. Updated plugins offer new features, security patches, and performance improvements. Outdated plugins can pose significant security risks to your site. By keeping your plugins current, you ensure your e-commerce site runs smoothly and securely.