How to Integrate Mailchimp with WordPress
MailChimp is one of the most popular email list management services available now. On the other hand, WordPress is a widely used platform for creating websites. A large portion of bloggers and/or website owners use both of these services. What if you can connect your MailChimp account with your WordPress site and build up your email list(s) from your website?
Yes, that will be awesome. And today, I will introduce you to one such plugin which lets you do that and more. I am talking about MailChimp for WordPress. In today’s post, I will introduce you to this plugin and show how to use it.
Getting Started
First of all, download and install MailChimp for WordPress from WordPress plugin directory. Activating the plugin will create a new menu item titled ‘MailChimp for WP’ in your website dashboard.
Go to MailChimp for WP > MailChimp to start the set up process. You will be taken to a page similar to this –
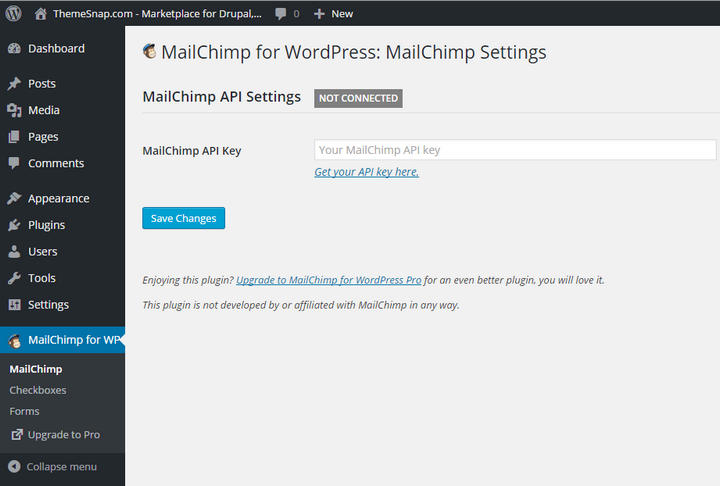
Connecting your MailChimp Account
As you can guess, you have to connect your MailChimp to your website first. To do that, you need to collect an API key from your MailChimp account. Click the ‘Get your API key here’ link. You will be taken to the MailChimp website. After logging in, you will be redirected to the API page. Head towards the ‘Your API keys’ section and copy your API key.

Now, get back to the MailChimp settings page in your website dashboard. Paste the copied API key into the field and click ‘Save Changes’. If everything is okay, your MailChimp account will be connected with your website and you will be provided with a green ‘CONNECTED’ status. The plugin will also fetch your lists automatically.
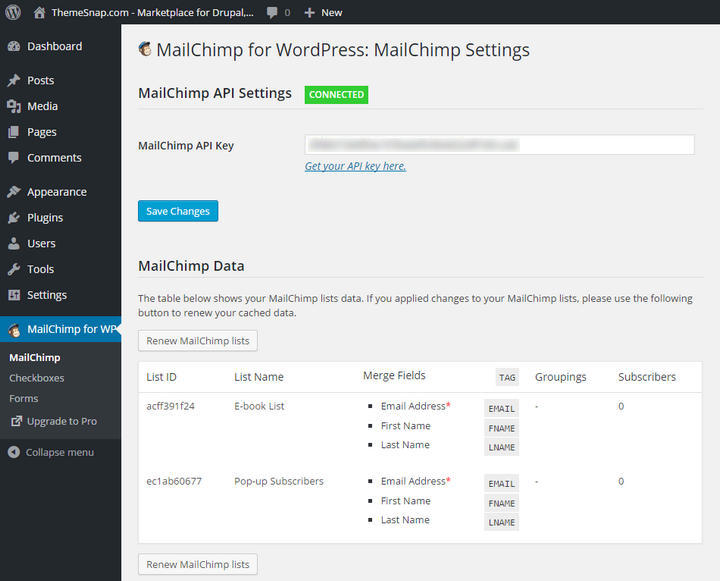
If you want to add new lists, you can do that in the MailChimp website and click the ‘Renew MailChimp Lists’ button on the plugin settings page to import the new list.
Using the Checkboxes
Now that you have connected your MailChimp account with your WordPress site, let’s see how to use the plugin to build up your email list. Go to MailChimp for WP > Checkboxes. From this page, you will be able to add checkboxes for the visitors who want to subscribe to your newsletter.
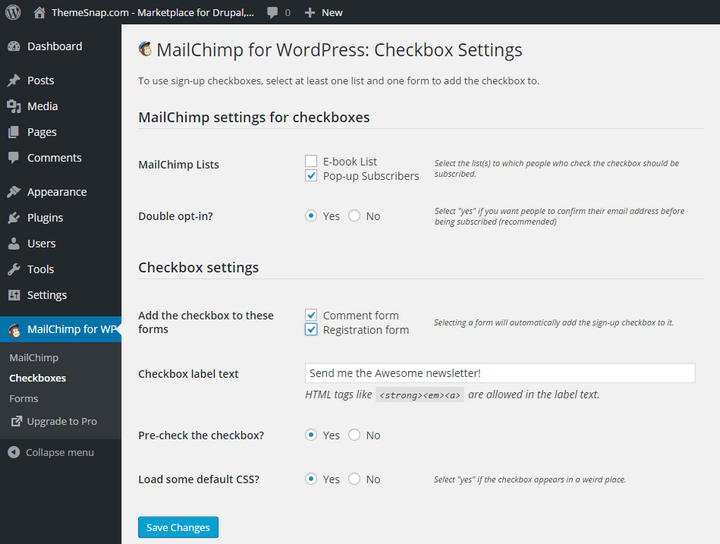
In the ‘MailChimp Lists’ field, you can choose in which list the visitor should be included. Then, you can enable or disable double opt-in.
Then, in the ‘Checkbox settings’ section, you can choose to add the checkbox in the comment and/or the registration forms. Below, you can customize the label text, choose to pre-check the checkbox and load default CSS.
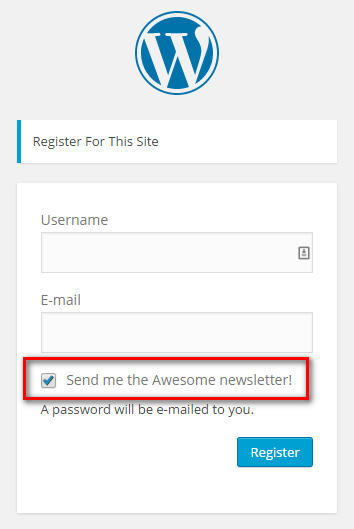
After making all the changes, click ‘Save Changes’. Here’s a preview of how it looks like in the registration form –
Using Forms to get More Subscribers
MailChimp for WordPress also lets you create basic subscriptions forms. To add a new form, go to MailChimp for WP > Forms. You will see a page like the following –
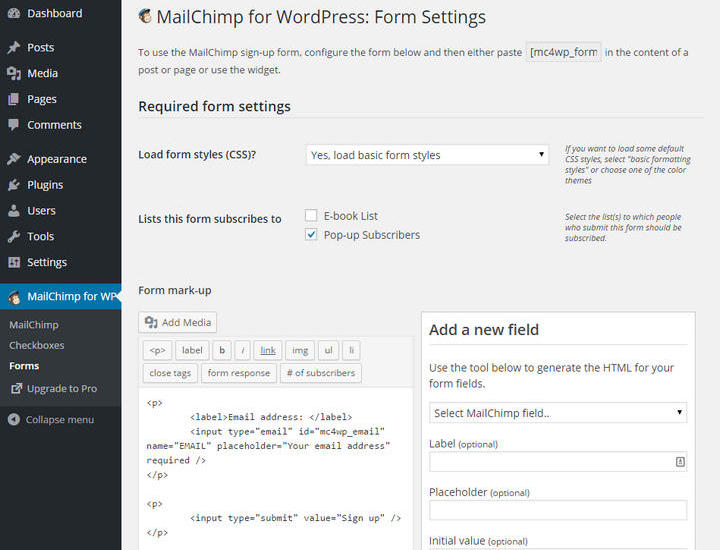
First of all, you can choose a layout for your form. You will find a list of the layouts in the ‘Load form styles (CSS)’ drop-down menu. You can choose any of the light, red, green, blue or dark themes. Then, select the list where the subscribers should be added.
Next, in the ‘Form mark-up’ section, you can build a customized form. Select a field from the ‘Add a new field’ section, choose the options and copy the generated HTML code from the bottom. Then, paste the HTML code in the left box. Available field include first name, last name, email address, submit button, subscribe/unsubscribe options etc. You can also choose to make these fields necessary.
In the ‘MailChimp Settings’ section, choose whether you want to enable double opt-in or not. Below, in the ‘From Settings & Messages’ section, you will be able to customize the messages for different actions like successful subscription, invalid email address, required email address missing, already subscribed etc.
After making all the changes, click ‘Save Changes’.
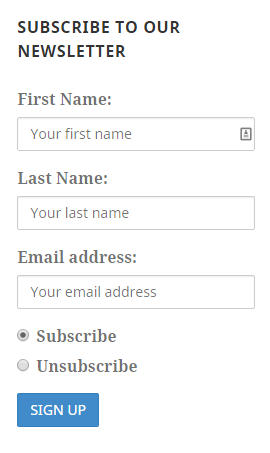
Now, you have two options to display the form. You can either use the widget or use the following shortcode –
[mc4wp_form]
Here is a preview of the widget with the form in blue color scheme –
Final Words
So, that’s how you connect your MailChimp account with your WordPress site. Let me know if you have any question about using the plugin.
And if you are using any other plugin for increasing your email subscribers, please share your experience with us by leaving a comment below.