A Guide to Using the iThemes Security Plugin in Your WordPress Website

What is the most popular platform for creating new websites? Yes, WordPress, we all know that. But do you know that the platform is also a very attractive target for the hackers?
The huge popularity of WordPress has encouraged hackers and potential abusers to look for different ways to break into WordPress sites. Therefore, it is very important that you shouldn't rely only on the default security settings.
Rather, you need to take additional steps for making your website more secure. Luckily, you don't have to do them manually. There are lots of free security plugins for WordPress, which can perform these tasks for you. iThemes Security is one of the most popular security plugins for WordPress.
In today’s tutorial, I will introduce you to iThemes Security and show how to use it in your WordPress site.
Getting Started
Download and install iThemes Security in your WordPress site. After activating the plugin, you will notice a new menu item titled ‘Security’ in your website dashboard.
Clicking on the new menu item will open a pop-up window like the following –
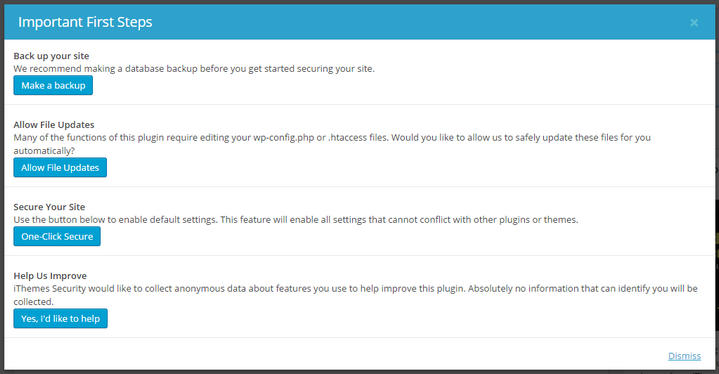
The ‘Make a backup’ button will create a database backup of your website. It is recommended to create a backup before using the plugin. The next button, ‘Allow File Updates’ will allow the plugin to update some core files including the .htaccess and the wp-config files.
‘One-Click Secure’ will take care of some basic security aspects of your website. None of these actions will conflict with any existing theme or plugin. And the last one is optional. If you want to send anonymous data about your use of the plugin, click the last button.
After taking care of these steps, click ‘Dismiss’ from the bottom-right corner of the pop-up window. You will be taken to the dashboard of the plugin.
iThemes Security Dashboard
Once you are in the dashboard page, find out the section titled ‘Security Status’. It will look like the following –
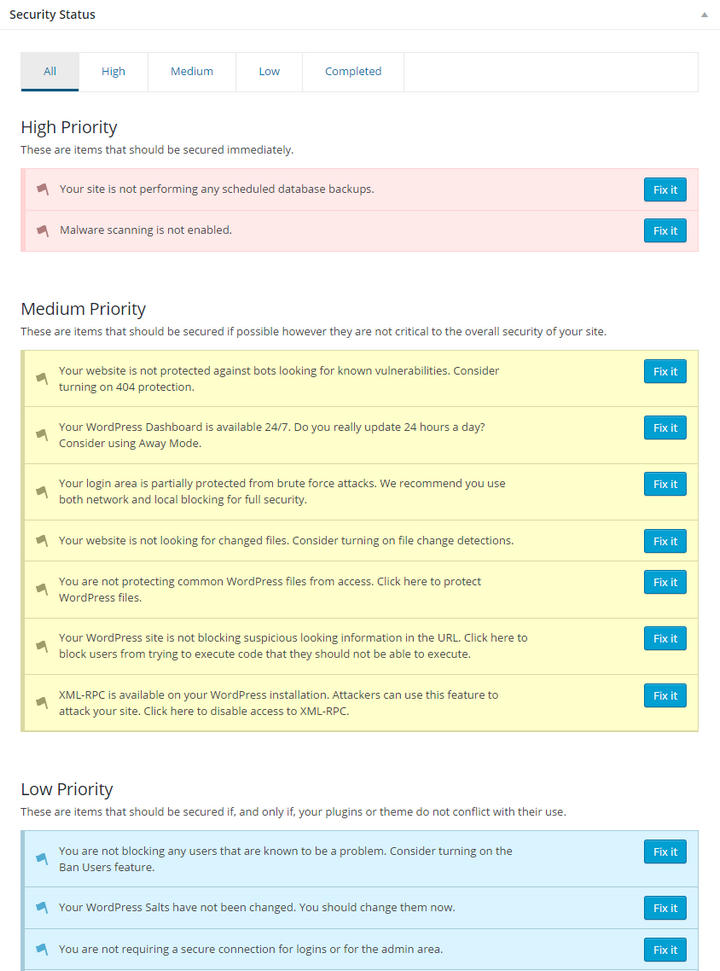
The Security Status section displays a detailed list of current issues in your website. As you can see, the issues are helpfully divided into several categories – High, Medium, Low and Completed.
You will also notice that each issue has a ‘Fix it’ button after it. Depending on the issue type, the issue could be solved by just clicking the button or taking some additional steps. Once an issue is addressed, it will be moved to the ‘Completed’ tab.
Make sure that there is no high priority issues left. Also try to take care of as many medium priority issues as possible. And lastly, take a close look into the low priority issues and find out if you want to fix any issue from that section.
After the security status section, you will find more sections containing information about the browser, file system, database, PHP, server, WordPress etc.
Setting up iThemes Security
The settings page is also divided into several sections. I will provide a brief introduction to the sections.
Global Settings
In this section, you can enable email notifications and specify the email address(s). Below, you will find separate fields to customize the lockout messages for various types of audience. You can also configure the lockout options from this section.
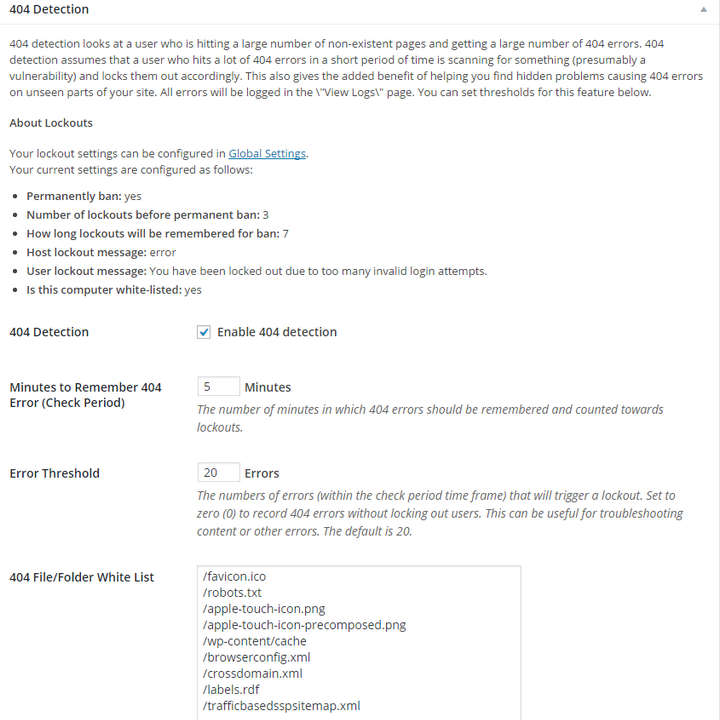
404 Detection
This section lets you identify the user who has been getting large number of 404 errors in a short period of time. By enabling the feature, you can save your site from potential hackers or abusers. The 404 detection feature lets you choose the lockout duration, error, threshold, ignored file types etc.
Away Mode
This feature lets you restrict access to your website dashboard for a specific period of time. By doing this, you can make sure that your website is safe while you are away.
Banned Users
iThemes Security lets you use the blacklist prepared by HackRepair.com and block those visitors in your site too. Additionally, you can also block specific hosts and/or user agents.
Brute Force Protection
By default, WordPress does not have any limit for the login attempts. If you want to protect your site from this vulnerability, you can enable this feature. It is possible to define the maximum number of attempts per user and/or per host.
Database Backups
As the name suggests, this feature lets you create a full backup of your website’s database. You can choose to save the backup files in your server, send to your email address or both. It is also possible to exclude specific tables from the backup.
Other Features
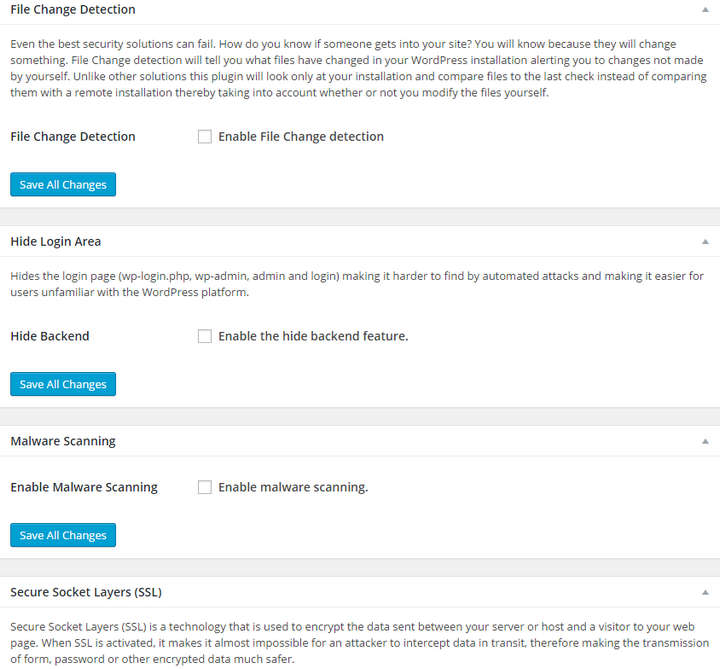
Below, you will find lots of other security features. Let me introduce you to the important ones. ‘File Change Detection’ lets you receive email notifications if anyone manages to change any file of your website. ‘Hide Login Area’ allows you to change the default slugs for login and registration.
‘Strong Passwords’ will make sure that the users of your website are using strong passwords for their accounts.
Advanced Features
The ‘Advanced’ page hosts some really advanced level features. Before making any changes from this area, make sure that you have a complete backup of your website database.
Most of the options available in the advanced section are indicated as ‘High Security’ issues in the dashboard. Therefore, if you have already taken care of the issues, you will not see any option here. If not, this is the prime time for you to address them.
Managing Backups
Do you remember that you configured some backup options in the ‘Settings’ page? Well, you configured those options for this page. If you click the ‘Create Database Backup’ button in this page, a backup will be created according to the defined settings.

Using Logs
Lastly, in the ‘Logs’ page, you will find detailed information collected by the plugin. You will also find detailed reports about the security steps you have taken and the result of them.
Final Words
There is nothing like a fully secure system. And WordPress is not an exception too. It is our task to make our website more secure. In that regard, third-party plugins like iThemes Security could be very useful.
After going through this rather long post, I believe you have got a clear idea about how to use iThemes Security in your website. However, if you are still confused about anything or want to know more about a feature, please let me know by leaving a comment below. I will be glad to help you.